This week Google announced Data Fusion, a new cloud-native ETL tool built atop Google Kubernetes Engine and the OSS CDAP project. Pipelines built in this tool are executed on Hadoop, with Dataproc being auto-provisioned and managed for you (or it can be run on your own Hadoop cluster on-prem or in AWS/Azure).
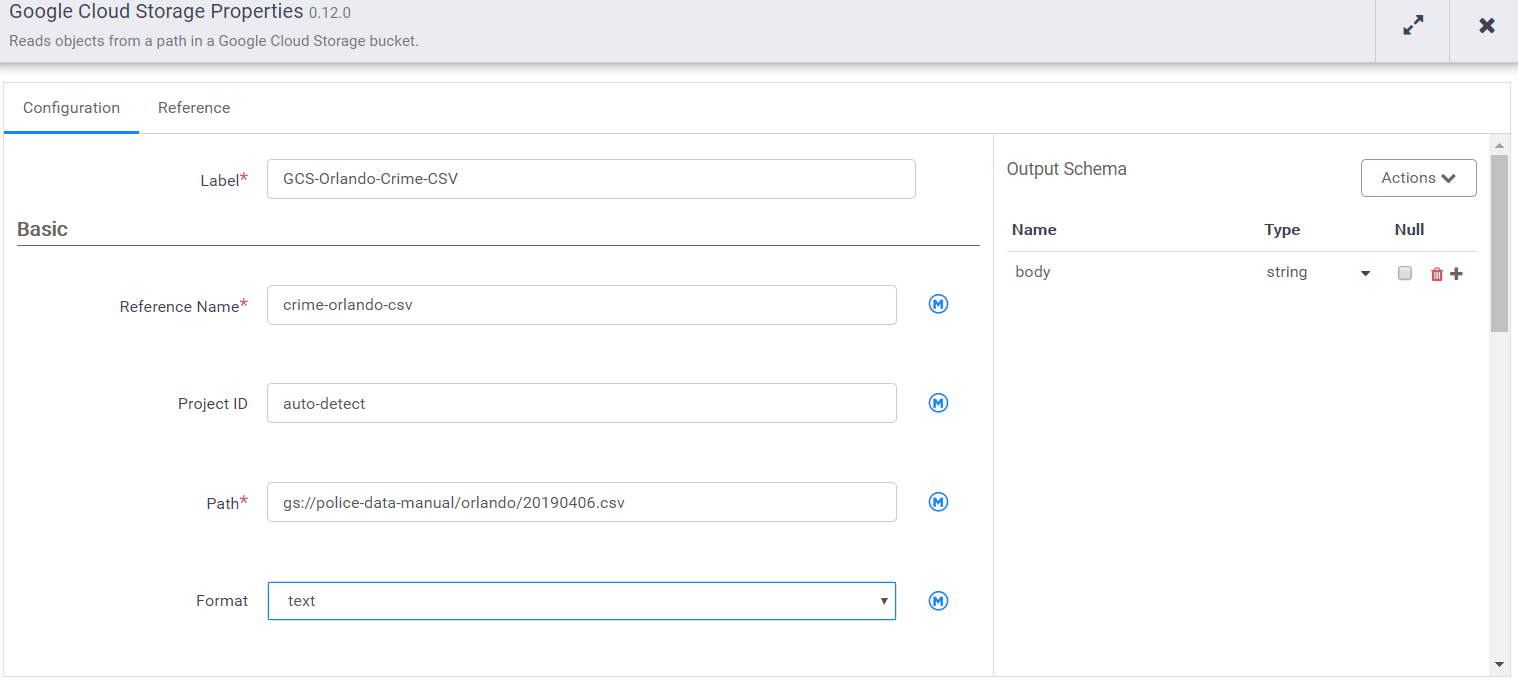
Let’s get started! We’ll start by adding a Google Cloud Storage source….
Then we’ll open the properties and specify the location of the CSV
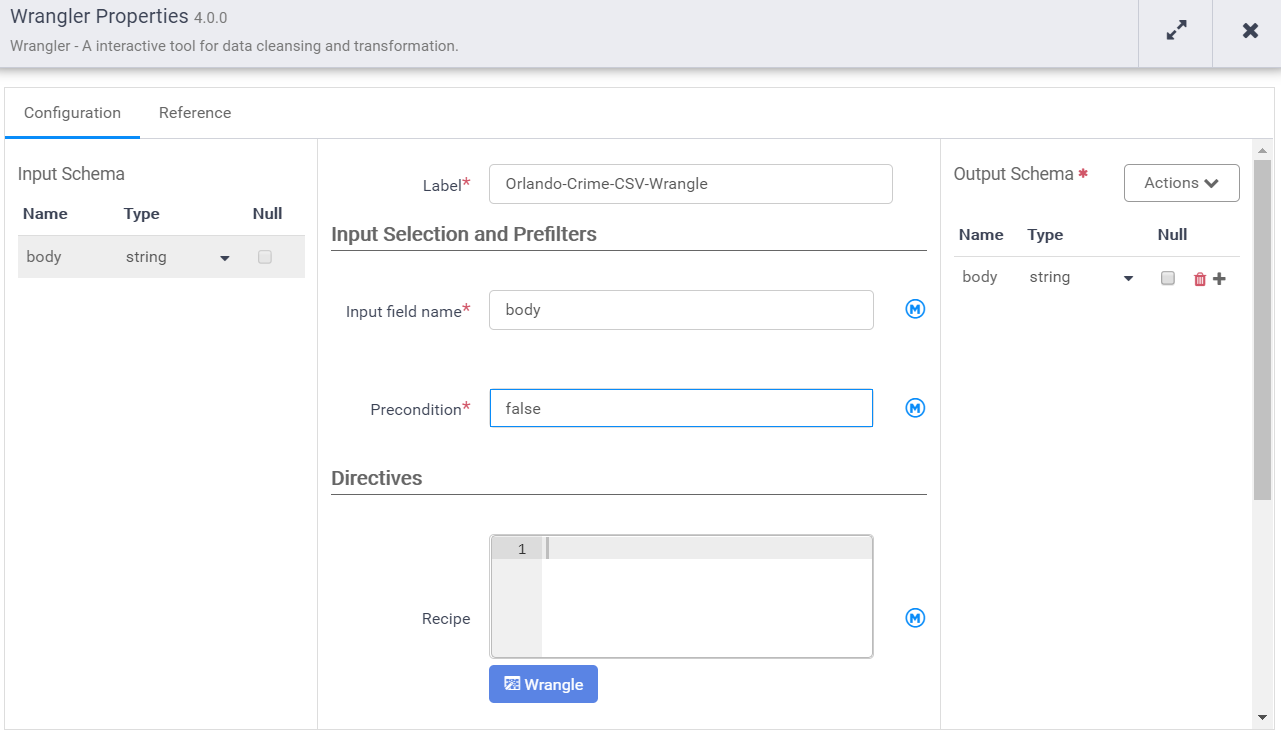
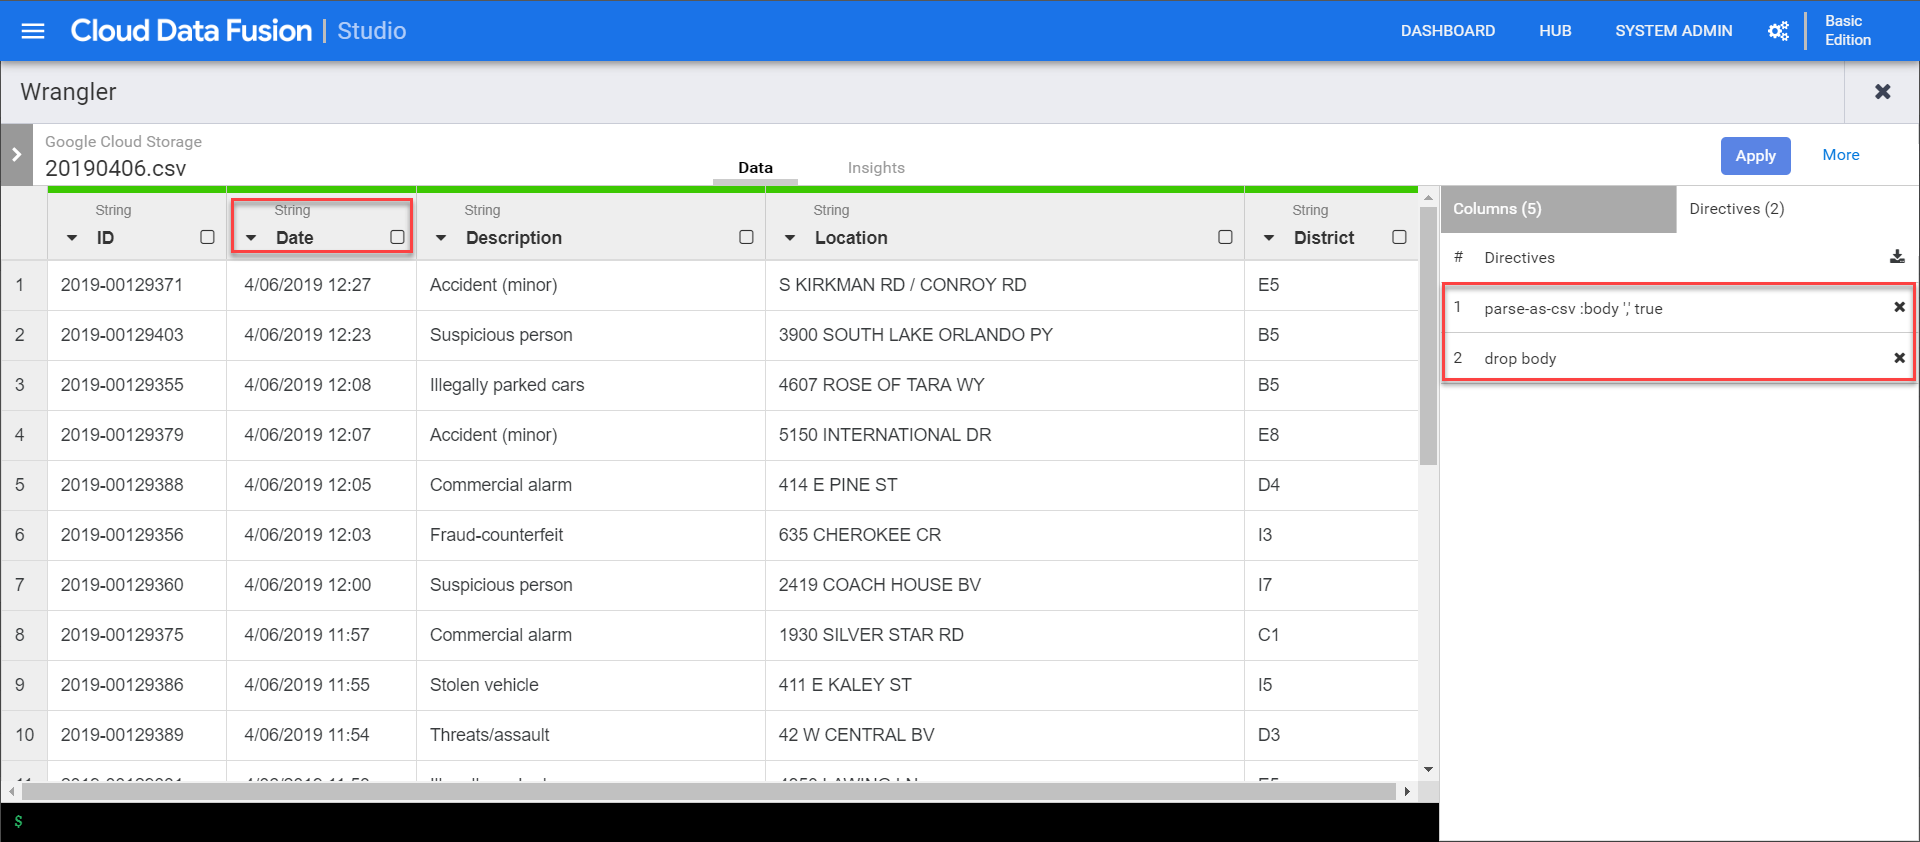
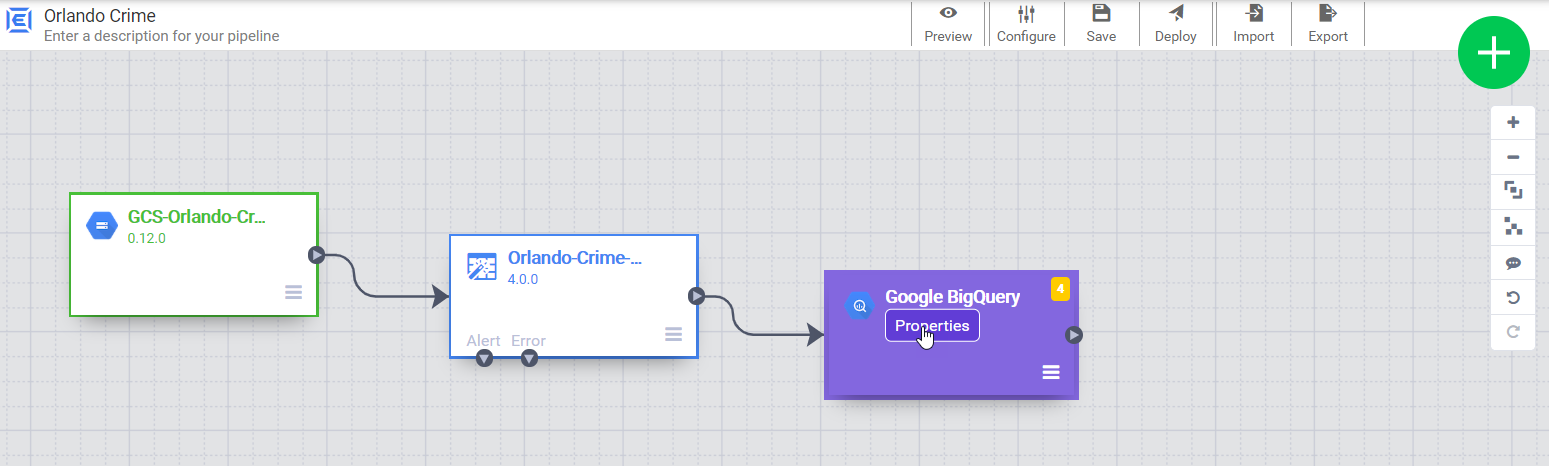
Now our pipeline has one field, “body”, that holds the entire content of the file. Next we add a wrangler to explore the content and define the schema. The output fields from the wrangler will be a the input for the BigQuery sink. Connecting them together establishes that relationship.
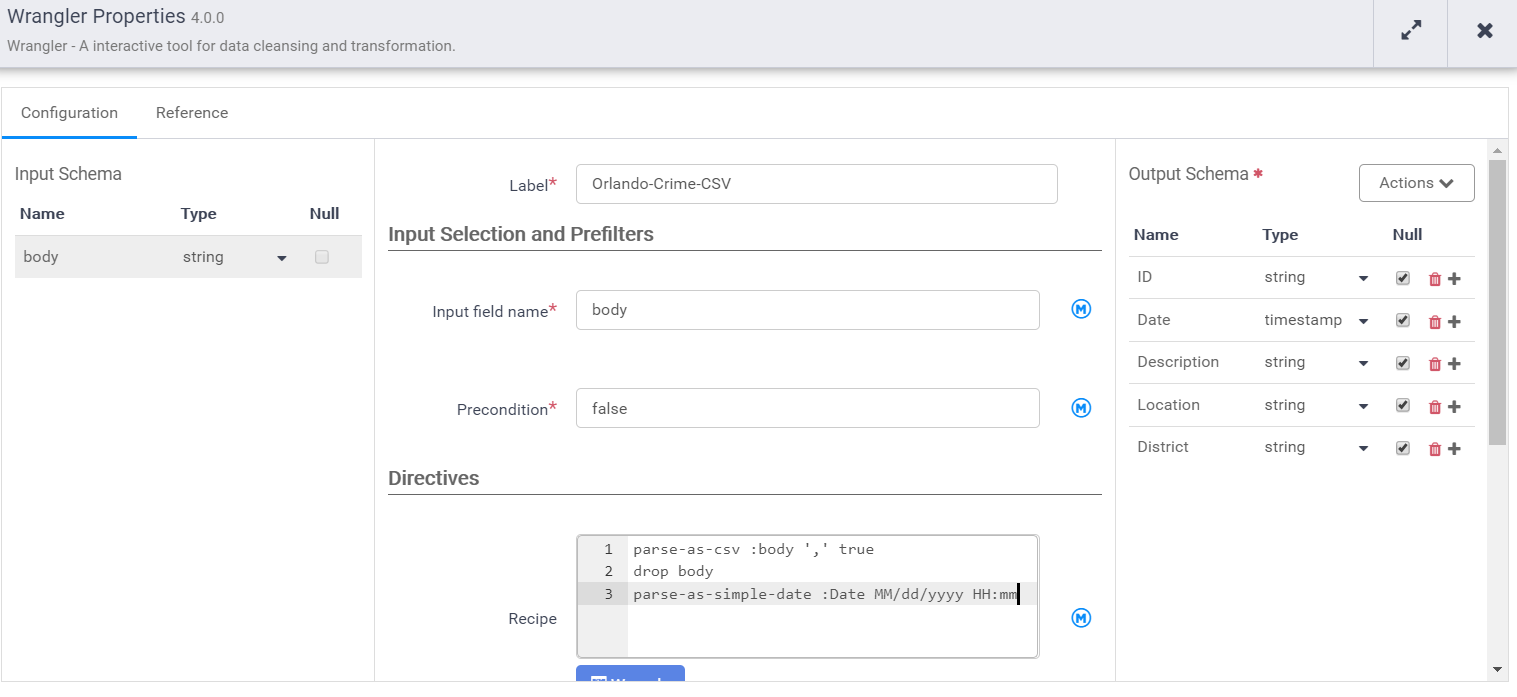
Notice that the input schema is “body” and it’s also the default output schema. We need to give it a label and a name. Then provide our recipe that transforms the input schema to the output schema.
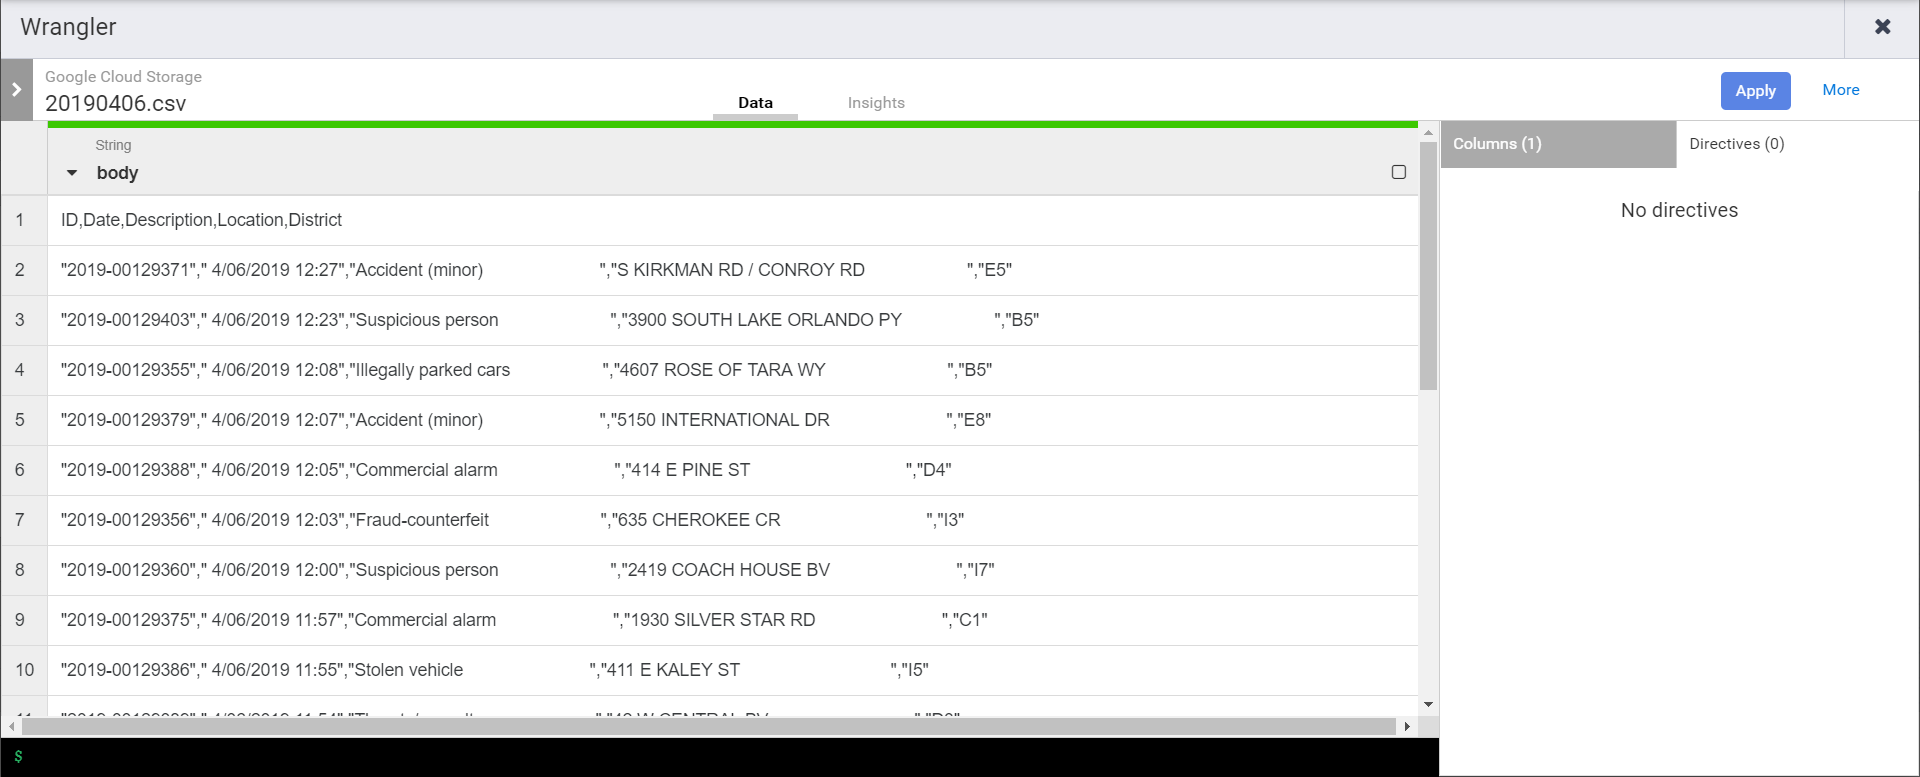
As soon as the wrangle window opens you’ll need to navigate & select one of the CSVs in the source bucket. That is because Data Fusion doesn’t pre-load anything in the pipeline, so we need to go wrangle from the exemplar in the bucket. Once selected we’ll see the one field currently in the schema.
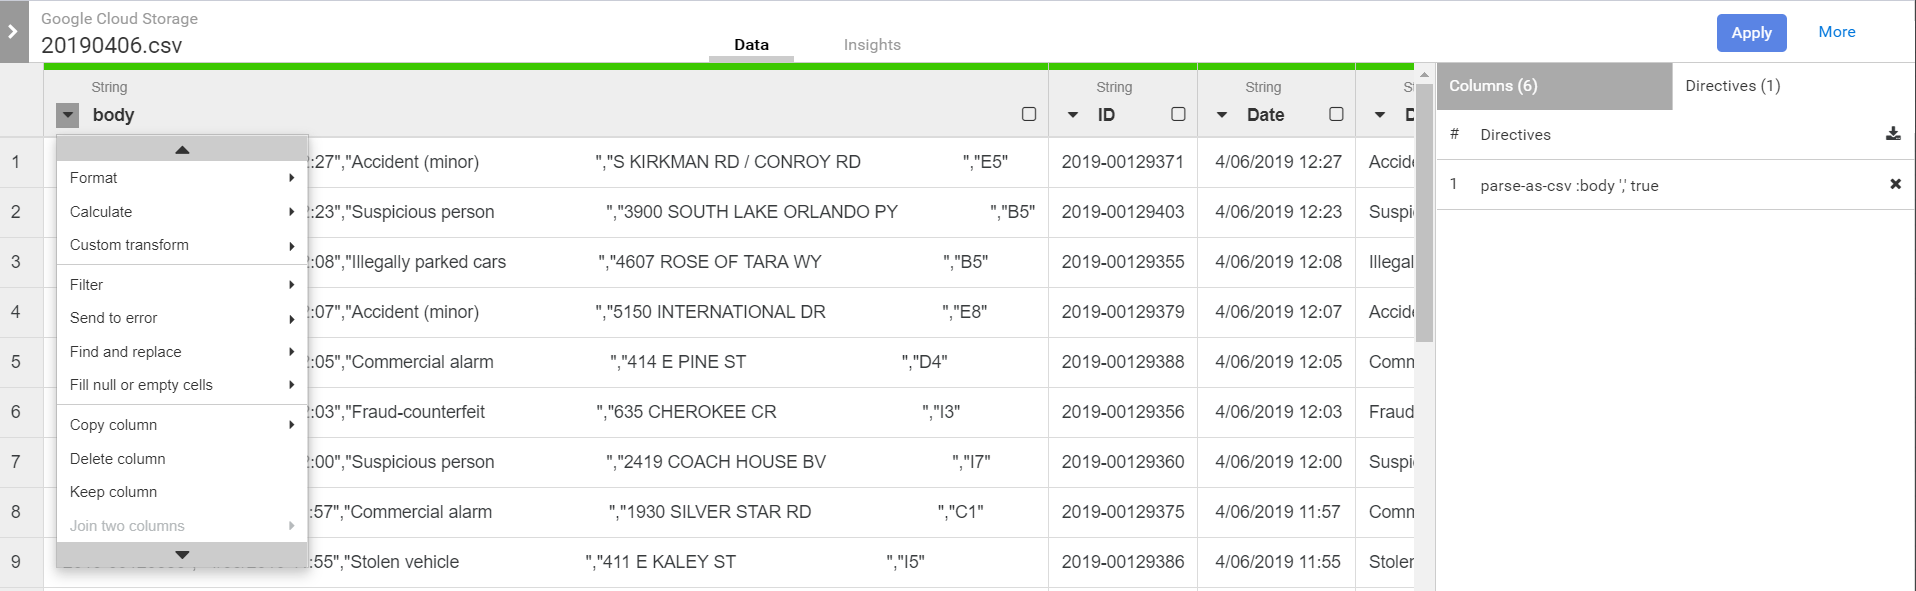
First we’ll need to split the body into multiple fields…
Once applied we can then drop body field…
Notice that the columns are all string by default. We’ll need to convert them to their appropriate types. As we do that we’ll see new directives being added to the wrangler.
Once done we can click apply to close the wrangler. The directives are then inserted into the directives recipe in the properties window. That recipe can be shared in the hub or later injected dynamically.
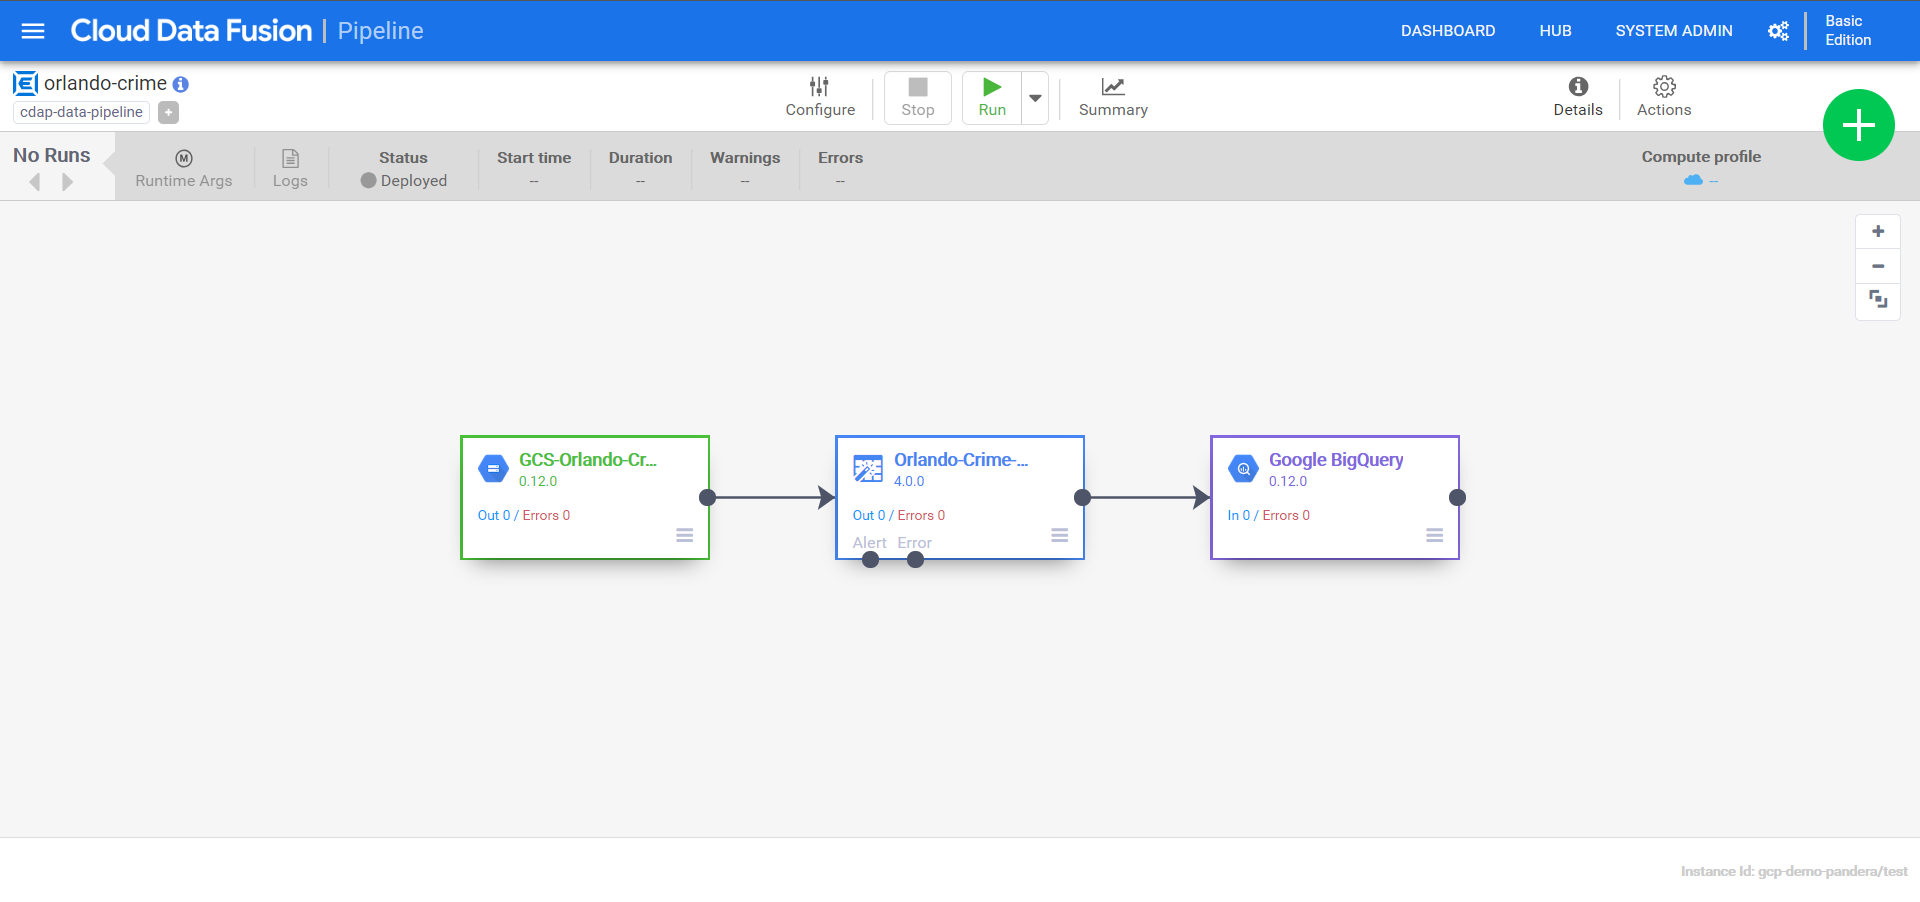
Now we can close the wrangler and add a BigQuery sink to the pipeline. We just need to give it a reference name, which is used to trace lineage (which can impact retention rules).
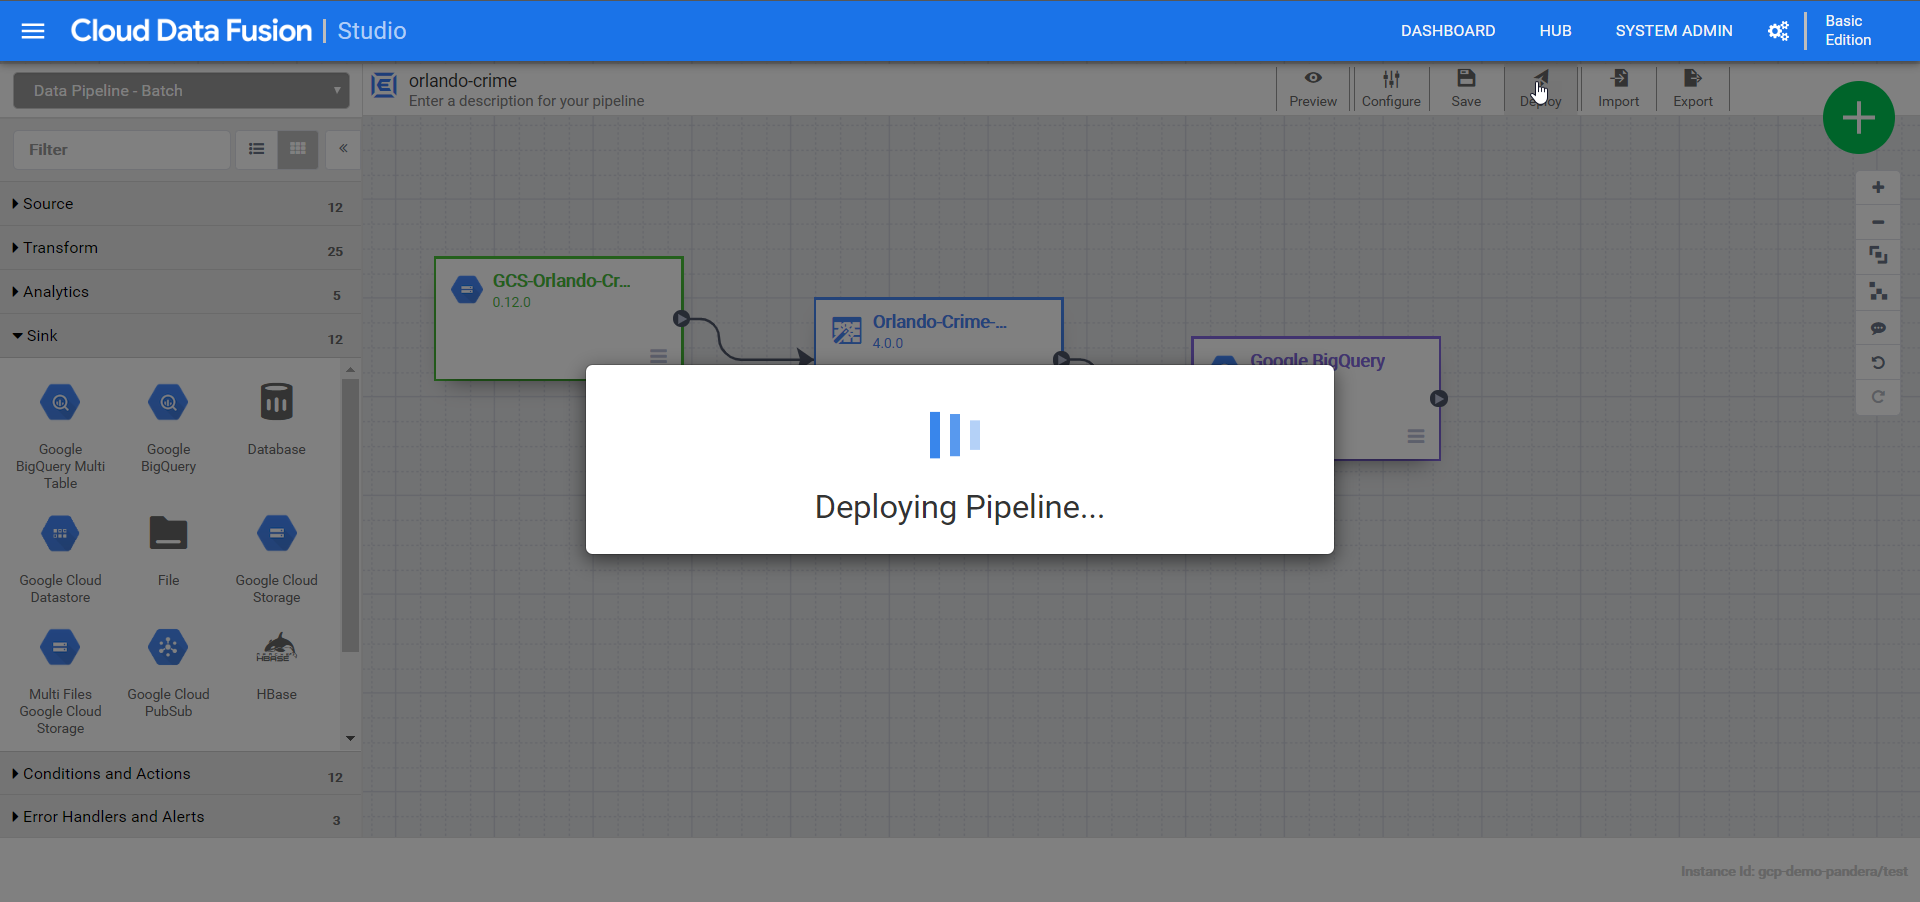
Time to deploy!
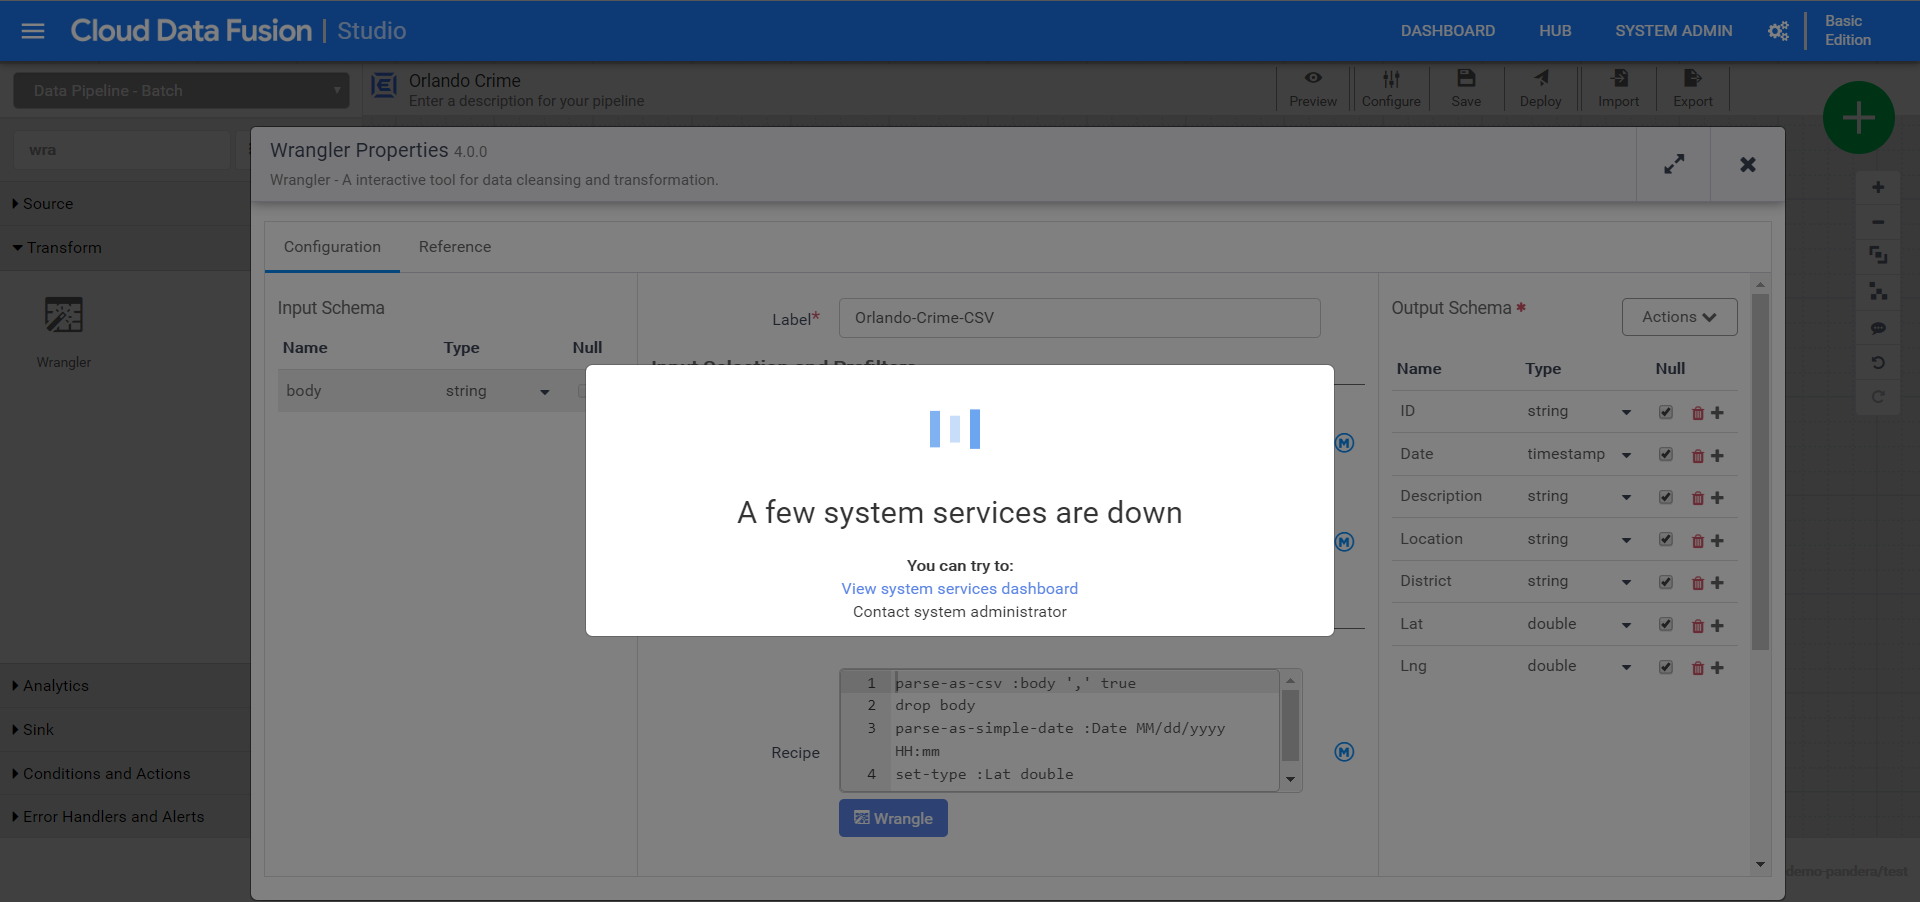
Rats! Got an error with the reference name.
After fixing it and deploying again, I can see the pipeline operations dashboard…
Let’s run this bad boy!!!
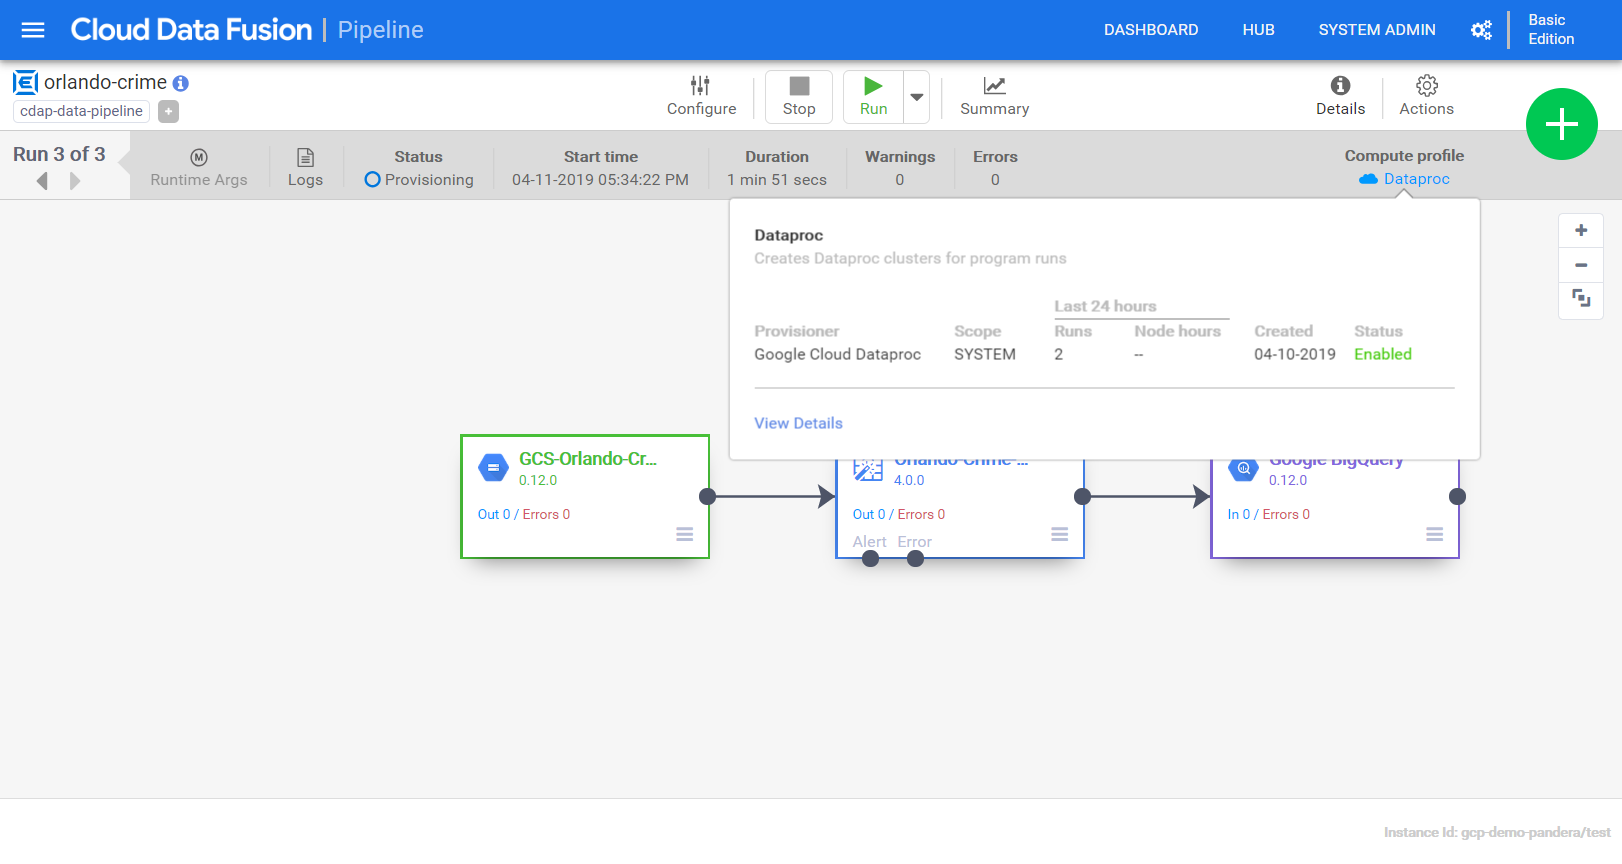
More errors! Eventually I’ll get there, just need to update a few permissions. In this case it’s the service account’s ability to spin up a data proc cluster that is the problem. I’ll give the service account Data Proc Admin role and try again. This time it works and I can see the cluster spinning up.
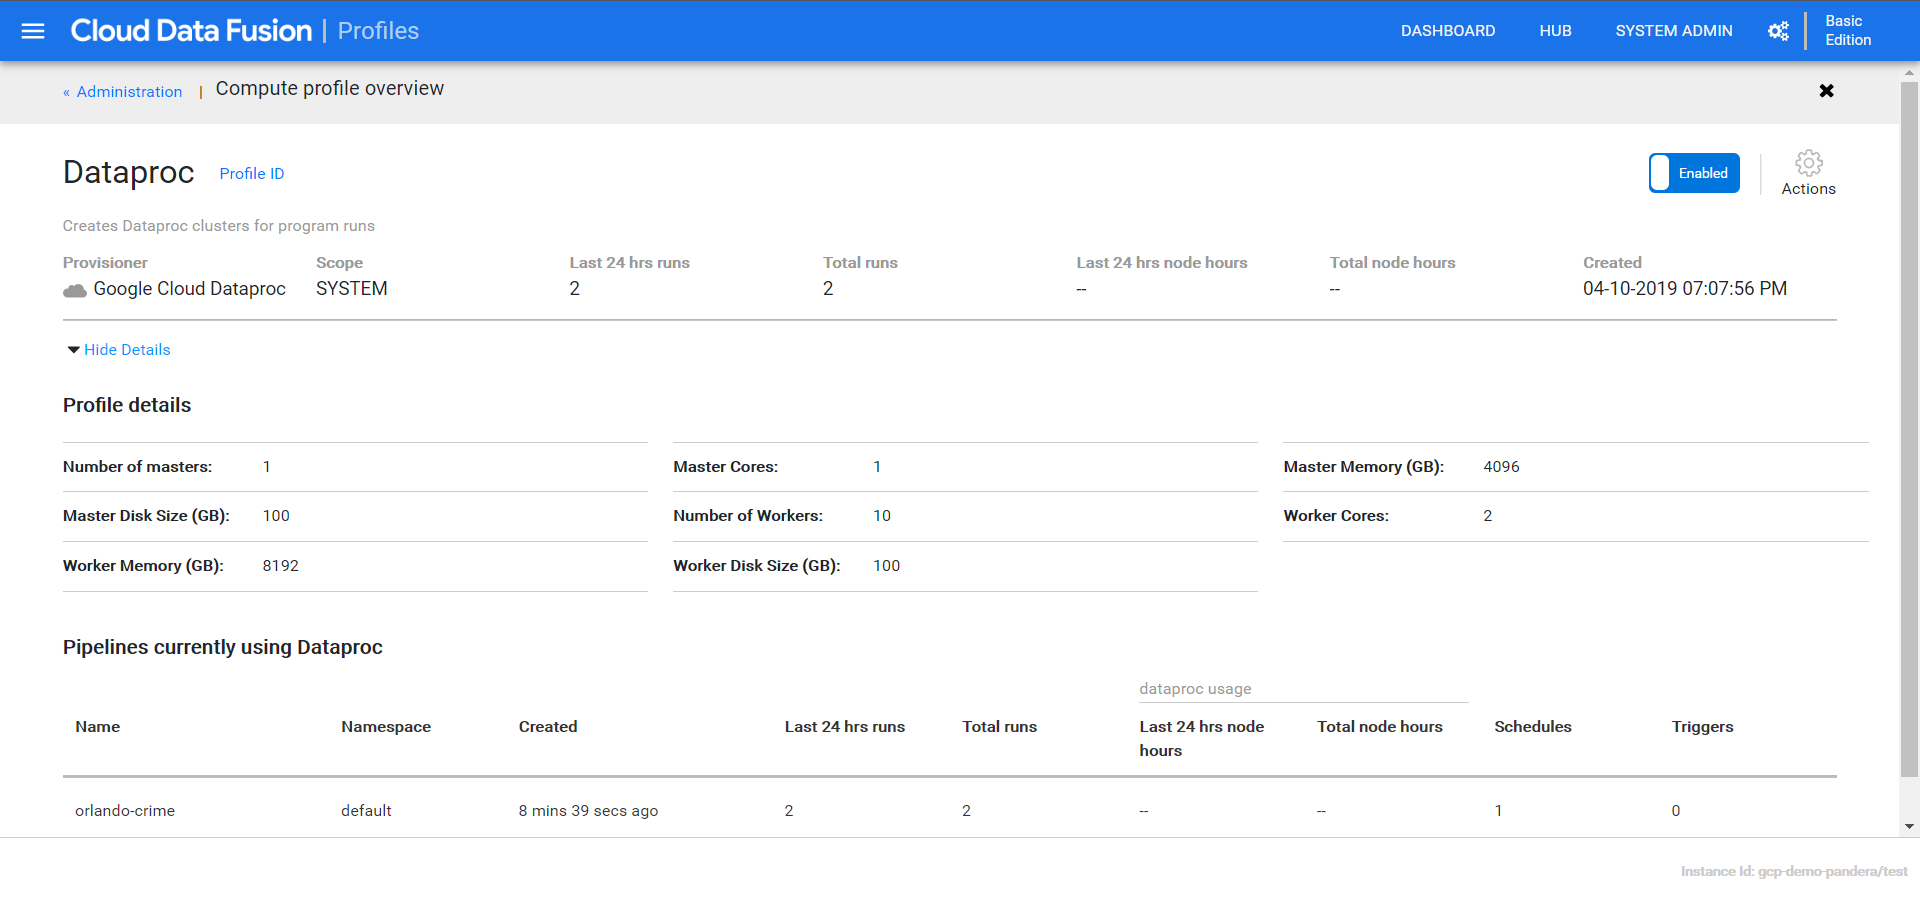
Clicking “View Details” gives me lots of information about the cluster and it’s operations/profile.
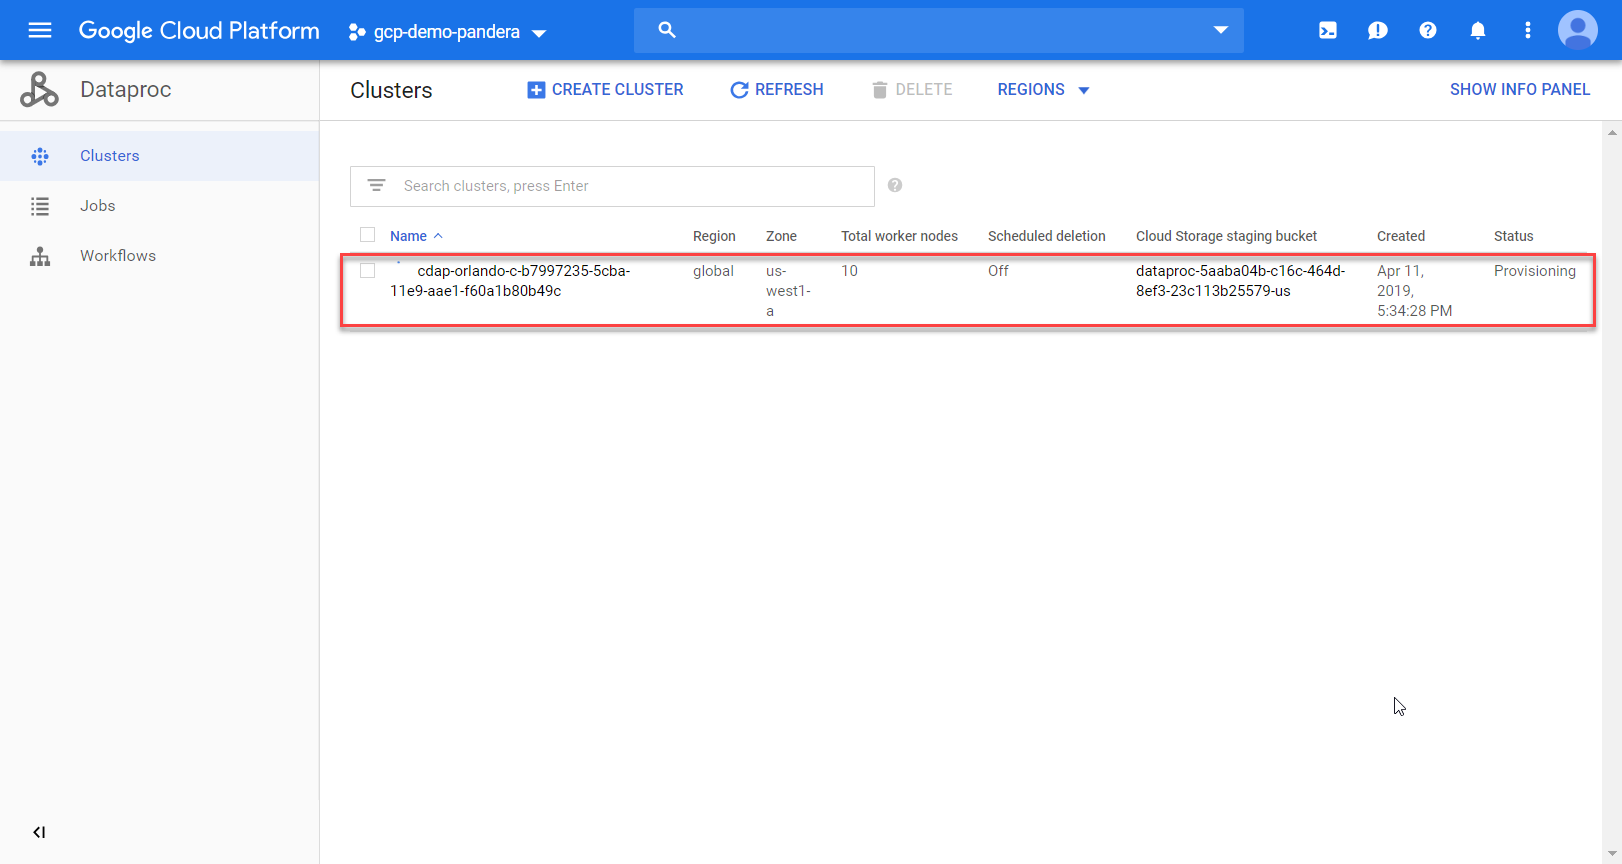
If I flip over to the data proc page I can see more details.
Well crap, another error. This time it says my BigQuery dataset doesn’t exist. I mistakenly put a dash instead of an underscore.
That really sucks. I just paid a few cents to have something spit out an error. Lesson learned though!! Lots of little permissions I didn’t set-up initially. A lesson to tell clients about when delivering training, for sure! For now I’ll fix and run again….
The great part of this is that it will all be torn down once it’s done! Once it’s done I’ll see my data in BigQuery.
Note you may periodically experience network connectivity issues, which happened to me as I wrote this. Be patient and it’ll come back online!
In the next post we’ll dig into the insights panel, use variables & macros, and import a massive trove of crime data. Until next time!
Let’s start by launching IntelliJ and click Create New Project
Click Next
Click Next again
Give it a name…
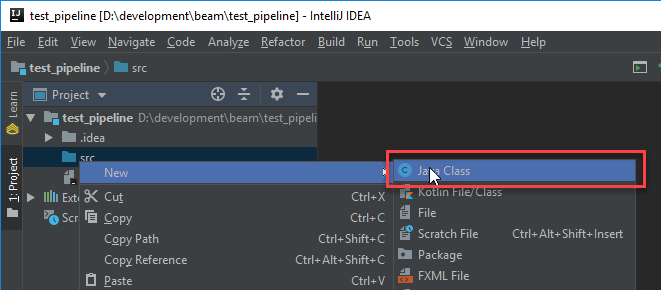
Add a new class into the source folder…
Any old name will do…
Go ahead and stub out the main method…
public class test_one {
    public static void main(String[] args) {
        System.out.println("Pipeline Execution Complete");
    }
}
Then build and test it to make sure it compiles and runs…
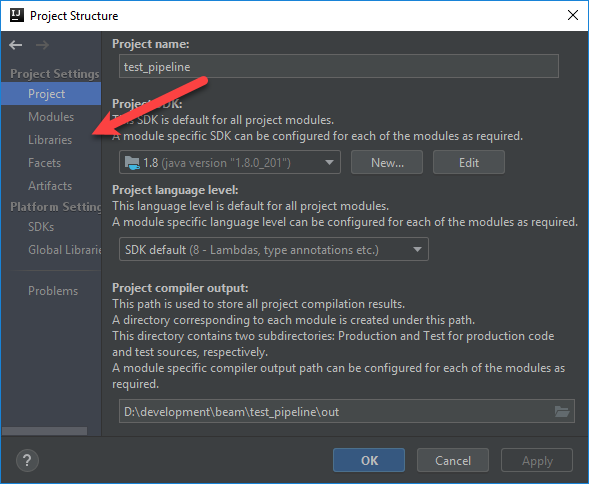
Now edit the Project Structure (Ctrl+Alt+Shift+S) so we can pull in the required libraries…
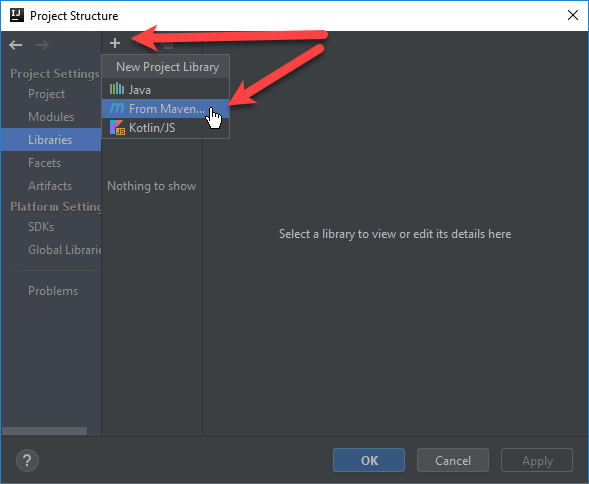
Click the plus sign and then select From Maven…
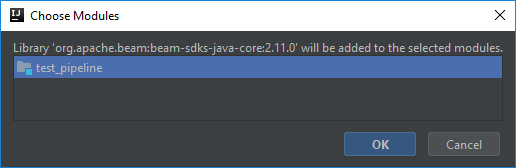
Type in Beam and click the Magnifying glass. Wait for the list to load and then select the java core for beam and click OK…
When prompted click OK…
Repeat the process but this time pick the direct runner for java
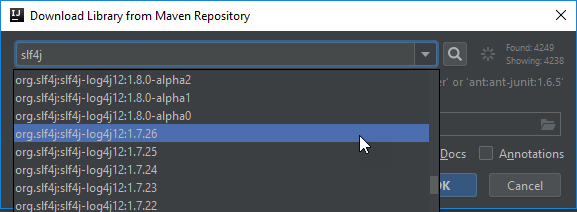
Repeat one last time for the slf4j logger…
Click OK on the Project Structure dialog and return to your java class. Let’s instantiate a Dataflow pipeline….
import org.apache.beam.sdk.Pipeline;
import org.apache.beam.sdk.options.PipelineOptionsFactory;

public class test_one {
    public static void main(String[] args) {
        Pipeline p = Pipeline.create(PipelineOptionsFactory.fromArgs(args).withValidation().create());
        p.run();
    }
}
Let’s build and test again…
Note the warnings about the logger. I’m ignoring that for now, but eventually it’ll have to be configured. Instead I’ll create a new PCollection that uses a SimpleFunction to convert all words in an array to uppercase. I then use a ParDo to write each word to the console.
import org.apache.beam.sdk.Pipeline;
import org.apache.beam.sdk.options.PipelineOptionsFactory;
import org.apache.beam.sdk.transforms.*;
import org.slf4j.Logger;
import org.slf4j.LoggerFactory;

public class test_one {
    private static final Logger LOG = LoggerFactory.getLogger(test_one.class);
    public static void main(String[] args) {
        Pipeline p = Pipeline.create(PipelineOptionsFactory.fromArgs(args).withValidation().create());
        p.apply(Create.of("apache", "beam", "rocks", "!" ))
                .apply(MapElements.via(new SimpleFunction<String, String>() {
                    @Override
                    public String apply(String input) {
                        return input.toUpperCase();
                    }
                }))
                .apply(ParDo.of(new DoFn<String, Void>() {
                    @ProcessElement
                    public void processElement(ProcessContext c)  {
                        System.out.println(c.element());
                    }
                }));
        p.run();
        System.out.println("Pipeline Execution Complete");
    }
}
Now I can run this to see the results!
Sweet! Note how the order of the results has changed! That is expected as the direct runner matches the parallelism across the workers. With everything running locally I can now test out new beam pipelines without having to incur a cost within GCP. The downside to that is that local runners doesn’t implement the beam model the same as dataflow. The upside is I can use components running local in docker or kubernetes!
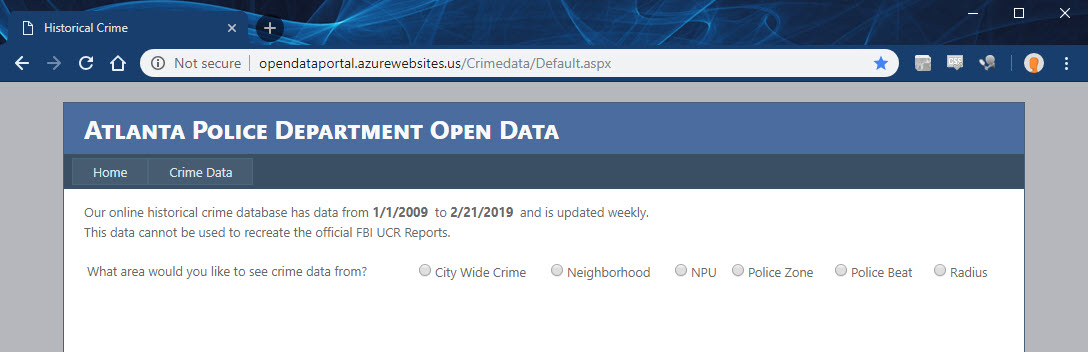
I’d like to import more crime data into my dashboards. In this post I’m going to tackle the City of Atlanta’s Open Data website. Unlike my previous efforts with the City of Orlando, this city does not provide an easy endpoint I can call upon. Here’s what it looks like….
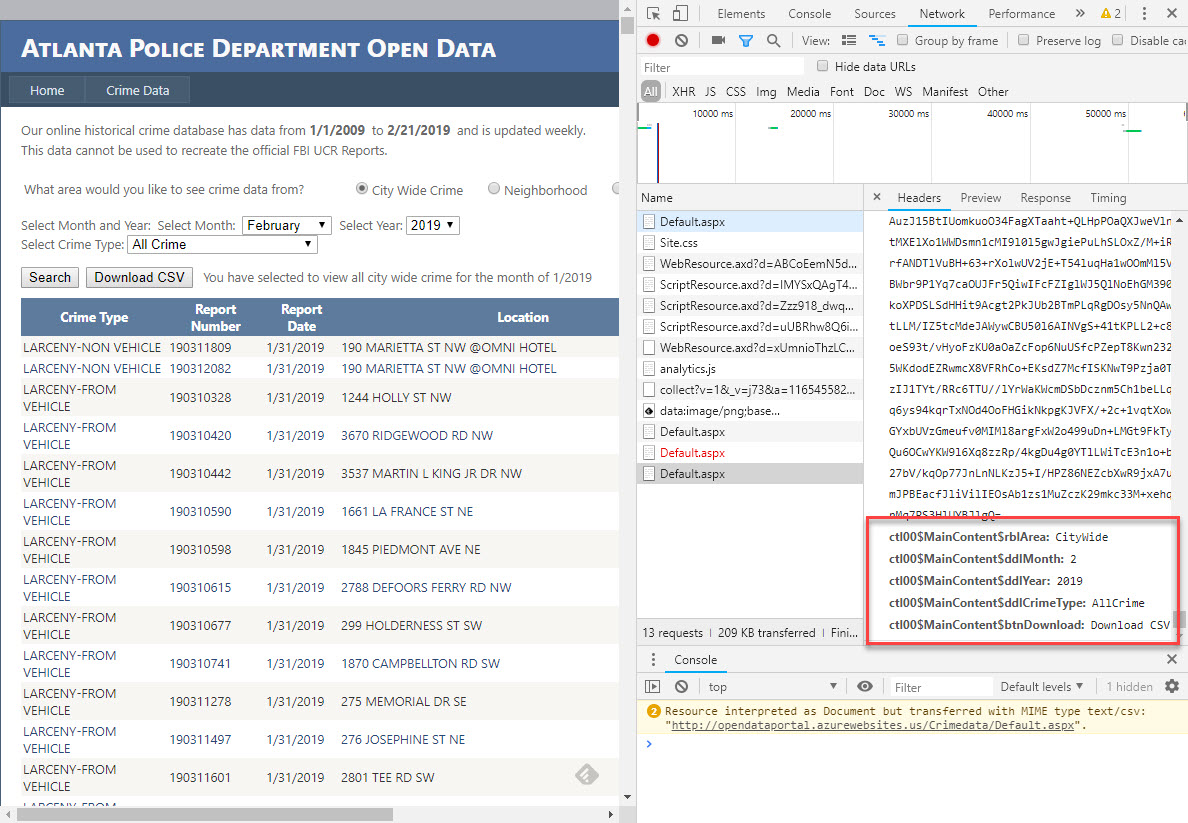
This site requires that I complete their interactive form in order to pull data. First I’ll have to select the City Wide Crime source. Inspecting the network panel reveals the form data that needs to be posted.
Then I’ll have to pick the month & year and run the search. Then the form will give me a link to download the results. Clicking that link downloads a CSV file. It’s that CSV that I’ll want to pull into my data lake.
The schema of this file is different from the Orlando files I previously tackled. It already contains the Latitude & Longitude. It also doesn’t have a description but instead as a category. It also only gets updated once per day (whereas Orlando was every 10 minutes).
Writing the script
For this task I’ve selected Python 3.7 because I can run it locally via Visual Code (on Windows), run it in the cloud console (Linux), run it on a Micro compute instance (Linux), or run it as a cloud function.
Last step is to put them into functions and sequence the actions after invocation…
defmain():
print("Getting Data")
data = getData()if data isNone:
print("Error getting data")
else:
saveData(data)#use local credentials if present
credFile = os.getcwd()+"\\credentials.json"if os.path.isfile(credFile):
os.environ["GOOGLE_APPLICATION_CREDENTIALS"]= credFile
main()
Now to run it and see what happens….
Success! Now I want to create a cloud function that implements this script.
Creating a Cloud Function
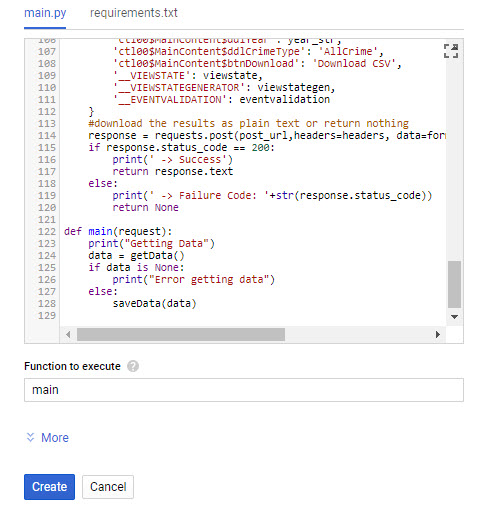
Instead of putting the script onto a compute instance I’d like to put it into a cloud function. In the dialog I just need to select the Python 3.7 run-time and ensure the requirements include the two key external libraries (google cloud storage and beautifulsoup).
The default method in the main.py file specifies that one parameter will be passed in. So when I paste in my script I just need to update the main method to take one parameter. I won’t use it for anything, but if I don’t include it I’ll get an error in Stackdriver upon invocation. Then the last thing to do is to change the function to execute to “main”…
Scheduling the script
When I created the Orlando data pipeline there was no simple way to create cron/scheduler jobs to run within the Google Cloud Platform. At that time it made sense to use the micro instance for both the scheduling and scraping of content. Now, though, Cloud Scheduler has been released for General Availability and comes with up to three jobs for free each month.
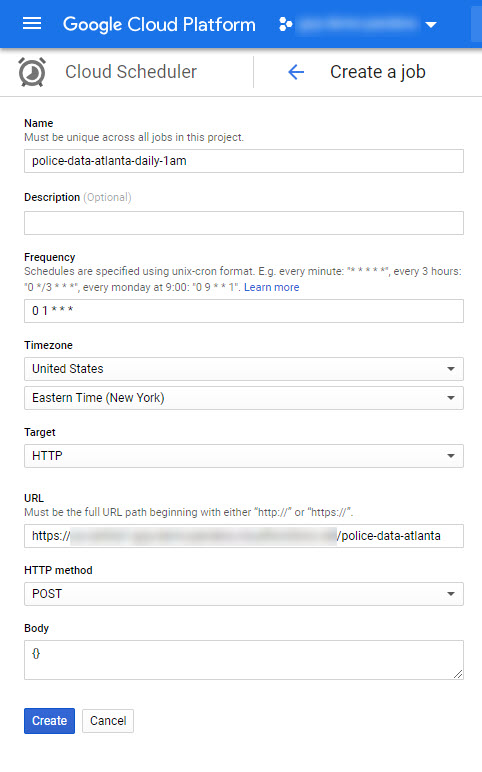
To get started you just have to search for the product…
After you click Create Job you’ll see the form depicted below. The two key things to enter into the form is the Frequency and the Target. I quick check of the crontab.guru gives me the appropriate schedule pattern value. The target gets set to HTTP, the URL is the address of cloud function, POST is the HTTP Method, and a valid json object is put into the body (in this case just an empty object).
After saving I clicked “Run now” and waited until there was a success result, as shown below.
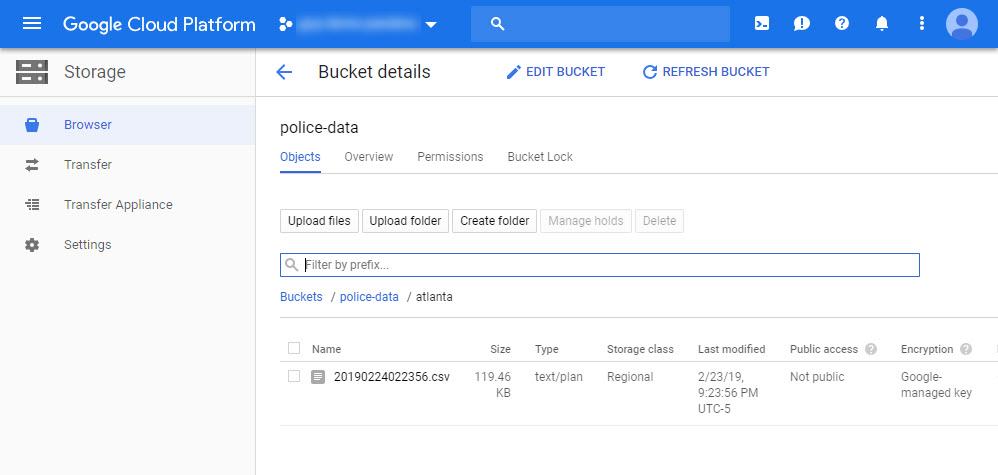
When I go check the storage bucket I do indeed see the file!
Data Studio
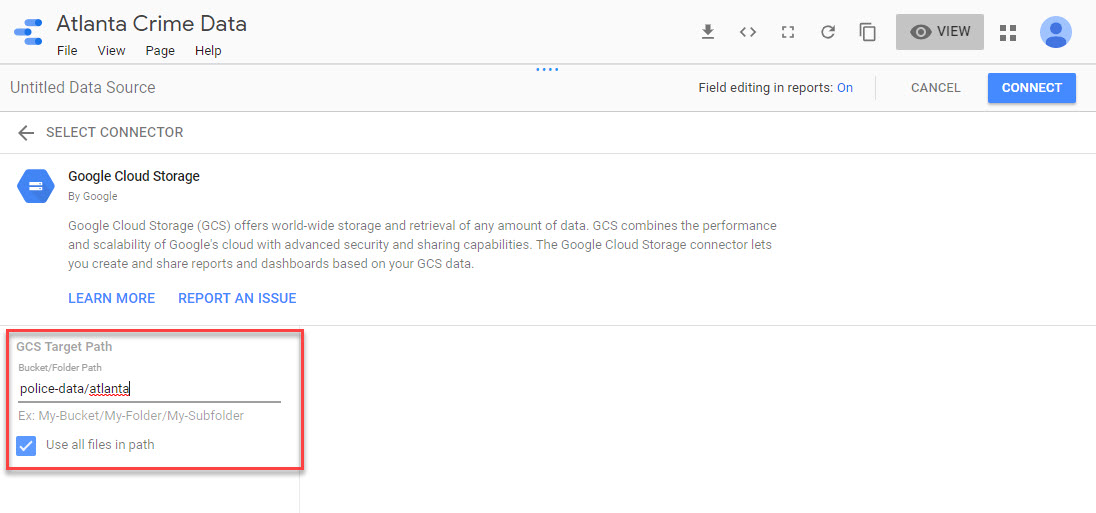
Before doing anything with Dataflow I can quickly mount this CSV into Data Studio to play with it. I’ll use the GCS connector and point to the bucket & sub-folder. Note the checkbox for using all of the files in the folder.
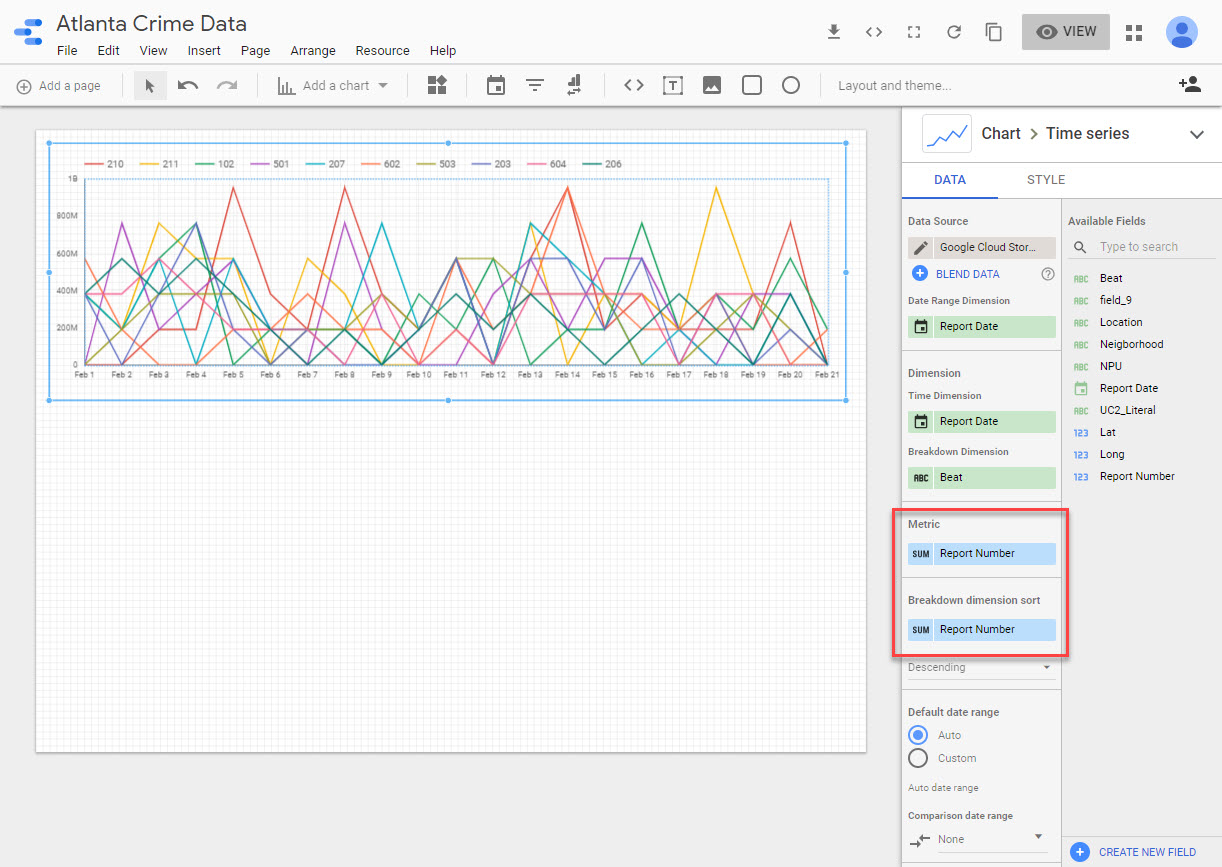
Once connected I can see that it’s messing up the schema for the beat…
I’ll have to fix that by converting it to a text field. Then I can save it and add a new Time Series chart. For some reason it tries to sum up the report number field, which yields counts in the millions.
I can fix this by modifying the schema and creating a new calculated field that performs a distinct count on the report number. Doing this will also ensure that any counts exclude duplicates (which will happen if I’m downloading every day). Ultimately this should be resolved in a Data Flow job.