Source of Data
I’d like to import more crime data into my dashboards. In this post I’m going to tackle the City of Atlanta’s Open Data website. Unlike my previous efforts with the City of Orlando, this city does not provide an easy endpoint I can call upon. Here’s what it looks like….
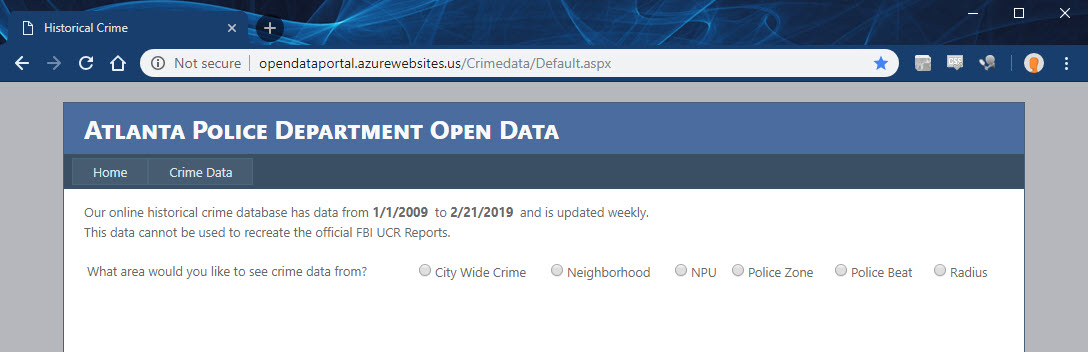
This site requires that I complete their interactive form in order to pull data. First I’ll have to select the City Wide Crime source. Inspecting the network panel reveals the form data that needs to be posted.

Then I’ll have to pick the month & year and run the search. Then the form will give me a link to download the results. Clicking that link downloads a CSV file. It’s that CSV that I’ll want to pull into my data lake.
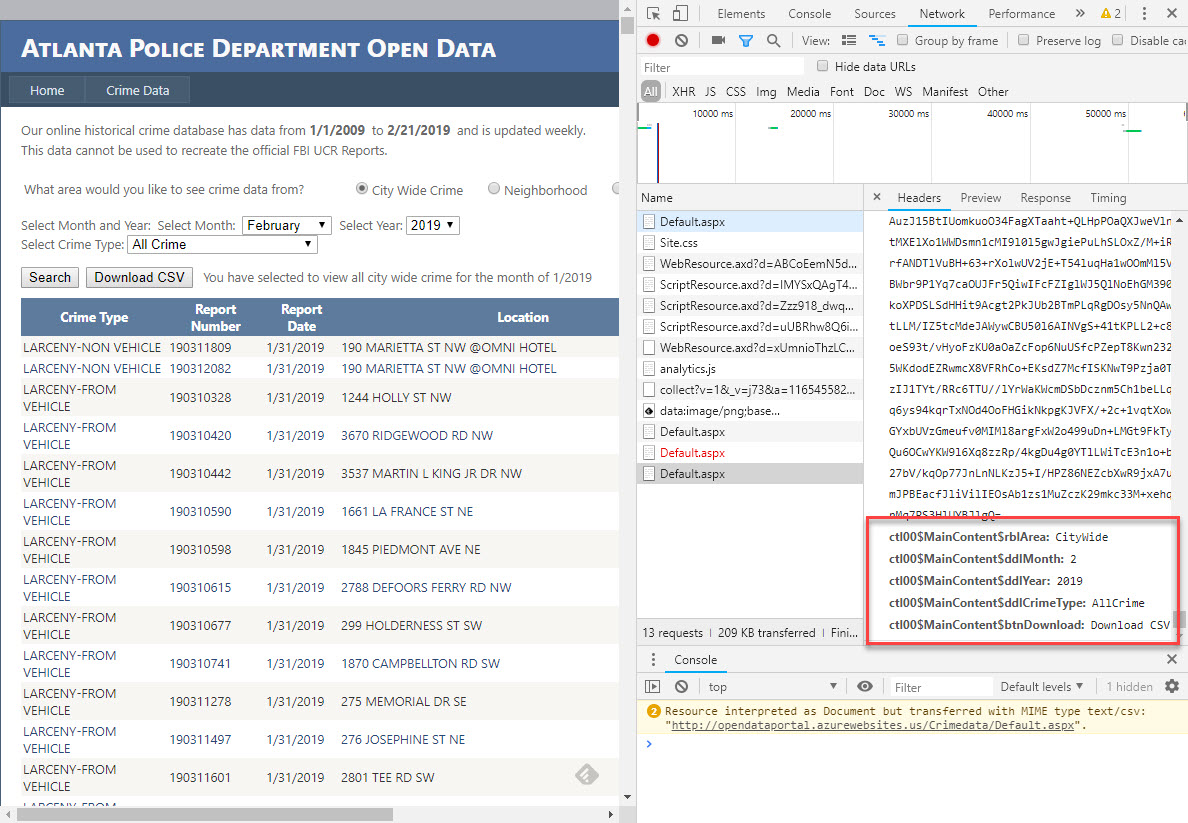
The schema of this file is different from the Orlando files I previously tackled. It already contains the Latitude & Longitude. It also doesn’t have a description but instead as a category. It also only gets updated once per day (whereas Orlando was every 10 minutes).

Writing the script
For this task I’ve selected Python 3.7 because I can run it locally via Visual Code (on Windows), run it in the cloud console (Linux), run it on a Micro compute instance (Linux), or run it as a cloud function.
I’ll start with these libraries:
- Requests to manage the http calls
- Beautifulsoup to inspect/access the form data
- Cloud storage to upload the data
- os and datetime for formatting of data
#!/usr/bin/env python3.7
import requests
import os
import datetime
from google.cloud import storage
from bs4 import BeautifulSoup

#runtime parameters/variables
bucket_name = 'police-data'
bucket_folder = 'atlanta'
First step is to get the form from the webserver and check the response code returned…
print('Requesting data')
post_url = "http://opendataportal.azurewebsites.us/Crimedata/Default.aspx"
headers = requests.utils.default_headers()
headers.update({
    'Accept': 'text/html,application/xhtml+xml,application/xml;q=0.9,image/webp,image/apng,*/*;q=0.8',
    'Accept-Encoding': 'gzip, deflate',
    'Accept-Language': 'en-US,en;q=0.9',
    'Cache-Control': 'max-age=0',
    'Content-Type': 'application/x-www-form-urlencoded',
    'User-Agent': 'Mozilla/5.0 (X11; Ubuntu; Linux x86_64; rv:52.0) Gecko/20100101 Firefox/52.0'
})
#first request will get viewstate
print(' -> Downloading form')
response = requests.get(post_url, headers=headers)
if response.status_code == 200:
    print(' -> Success')
else:
    print(' -> Failure Code: '+str(response.status_code))
    return None

#parse results and extract the viewstate metadata to be pushed into next request
bs = BeautifulSoup(response.content,features="html.parser")
viewstate = bs.find("input", {"id": "__VIEWSTATE"}).attrs['value']
viewstategen = bs.find("input", {"id": "__VIEWSTATEGENERATOR"}).attrs['value']
eventvalidation = bs.find("input", {"id": "__EVENTVALIDATION"}).attrs['value']
Second step is to post the “City Wide” selection along with the viewstate from the previous response…
#select the radio option for city wide crime
form_values = {
    '__EVENTTARGET': 'ctl00$MainContent$rblArea$0',
    '__EVENTARGUMENT': None,
    '__LASTFOCUS': None,
    '__VIEWSTATE': viewstate,
    '__VIEWSTATEGENERATOR': viewstategen,
    '__EVENTVALIDATION': eventvalidation,
    'ctl00$MainContent$rblArea': 'CityWide'
}
print(' -> Selecting City Wide Crime')
response = requests.post(post_url, headers=headers, data=form_values)
if response.status_code == 200:
    print(' -> Success')
else:
    print(' -> Failure Code: '+str(response.status_code))
    return None
#extract the view state from the form
bs = BeautifulSoup(response.text,features="html.parser")
viewstate = bs.find("input", {"id": "__VIEWSTATE"}).attrs['value']
viewstategen = bs.find("input", {"id": "__VIEWSTATEGENERATOR"}).attrs['value']
eventvalidation = bs.find("input", {"id": "__EVENTVALIDATION"}).attrs['value']
Third step is to now post the month & year form selections along with the updated viewstate from the previous response…
#format month/year selections for form submission
month_str = datetime.date.today().strftime('%#m' if os.name == 'nt' else '%-#m')
year_str = datetime.date.today().strftime('%Y')
#post the form selections
form_values = {
    '__EVENTTARGET': 'ctl00$MainContent$rblArea$0',
    '__EVENTARGUMENT': None,
    '__LASTFOCUS': None,
    '__VIEWSTATE': viewstate,
    '__VIEWSTATEGENERATOR': viewstategen,
    '__EVENTVALIDATION': eventvalidation,
    'ctl00$MainContent$rblArea': 'CityWide',
    'ctl00$MainContent$ddlMonth': month_str,
    'ctl00$MainContent$ddlYear': year_str,
    'ctl00$MainContent$ddlCrimeType': 'AllCrime',
    'ctl00$MainContent$btnSearch': 'Search'
}
print(' -> Searching Month/Year: '+ month_str + '/' + year_str)
response = requests.post(post_url,headers=headers, data=form_values)
if response.status_code == 200:
    print(' -> Success')
else:
    print(' -> Failure Code: '+str(response.status_code))
    return None
#extract viewstate from the form and maintain form values
bs = BeautifulSoup(response.text,features="html.parser")
viewstate = bs.find("input", {"id": "__VIEWSTATE"}).attrs['value']
viewstategen = bs.find("input", {"id": "__VIEWSTATEGENERATOR"}).attrs['value']
eventvalidation = bs.find("input", {"id": "__EVENTVALIDATION"}).attrs['value']
Fourth step is to post the button click so that the file is streamed in the response…
form_values = {
    'ctl00$MainContent$rblArea': 'CityWide',
    'ctl00$MainContent$ddlMonth': month_str,
    'ctl00$MainContent$ddlYear': year_str,
    'ctl00$MainContent$ddlCrimeType': 'AllCrime',
    'ctl00$MainContent$btnDownload': 'Download CSV',
    '__VIEWSTATE': viewstate,
    '__VIEWSTATEGENERATOR': viewstategen,
    '__EVENTVALIDATION': eventvalidation
}
#download the results as plain text or return nothing
response = requests.post(post_url,headers=headers, data=form_values)
if response.status_code == 200:
    print(' -> Success')
    return response.text
else:
    print(' -> Failure Code: '+str(response.status_code))
    return None
Fifth step is to upload the results into a cloud storage bucket…
print('Saving data')
print(' -> Opening bucket: ' + bucket_name)
client = storage.Client()
bucket = client.get_bucket(bucket_name)
blobName = bucket_folder + "/" + datetime.datetime.today().strftime('%Y%m%d%H%M%S')+'.csv'
print(' -> Creating blob: ' + blobName)
blob = bucket.blob(blobName)
print(' -> Uploading blob content')
blob.upload_from_string(data, content_type='text/plan')
print(' -> Blob Saved with '+str(len(data.splitlines()))+' rows')
Last step is to put them into functions and sequence the actions after invocation…
def main():
    print("Getting Data")
    data = getData()
    if data is None:
        print("Error getting data")
    else:
        saveData(data)

#use local credentials if present
credFile = os.getcwd() + "\\credentials.json"
if os.path.isfile(credFile):
    os.environ["GOOGLE_APPLICATION_CREDENTIALS"] = credFile

main()
Now to run it and see what happens….

Success! Now I want to create a cloud function that implements this script.
Creating a Cloud Function
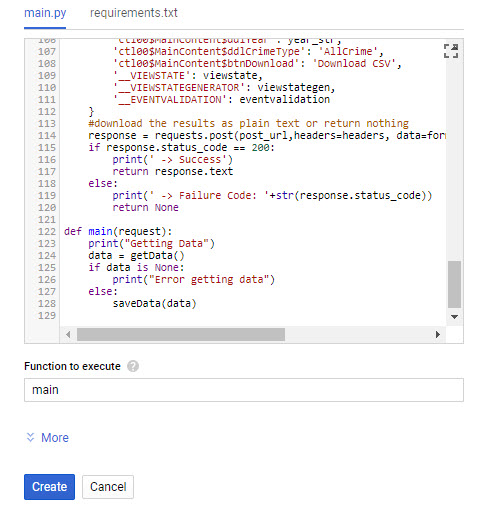
Instead of putting the script onto a compute instance I’d like to put it into a cloud function. In the dialog I just need to select the Python 3.7 run-time and ensure the requirements include the two key external libraries (google cloud storage and beautifulsoup).

The default method in the main.py file specifies that one parameter will be passed in. So when I paste in my script I just need to update the main method to take one parameter. I won’t use it for anything, but if I don’t include it I’ll get an error in Stackdriver upon invocation. Then the last thing to do is to change the function to execute to “main”…
Scheduling the script
When I created the Orlando data pipeline there was no simple way to create cron/scheduler jobs to run within the Google Cloud Platform. At that time it made sense to use the micro instance for both the scheduling and scraping of content. Now, though, Cloud Scheduler has been released for General Availability and comes with up to three jobs for free each month.
To get started you just have to search for the product…

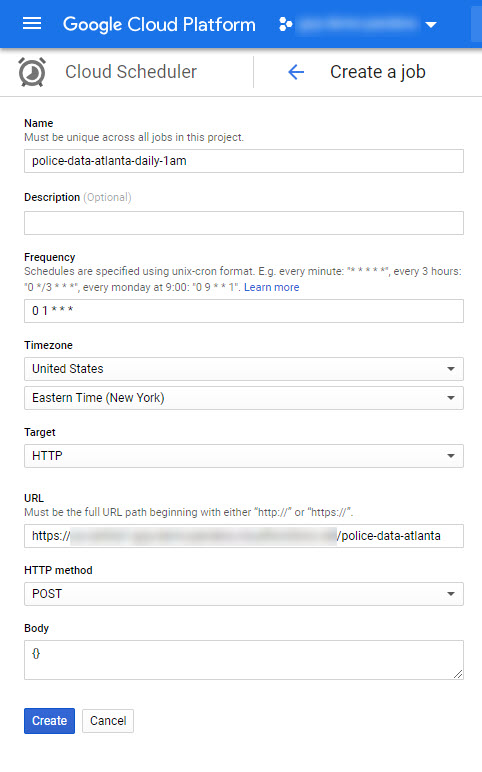
After you click Create Job you’ll see the form depicted below. The two key things to enter into the form is the Frequency and the Target. I quick check of the crontab.guru gives me the appropriate schedule pattern value. The target gets set to HTTP, the URL is the address of cloud function, POST is the HTTP Method, and a valid json object is put into the body (in this case just an empty object).
After saving I clicked “Run now” and waited until there was a success result, as shown below.

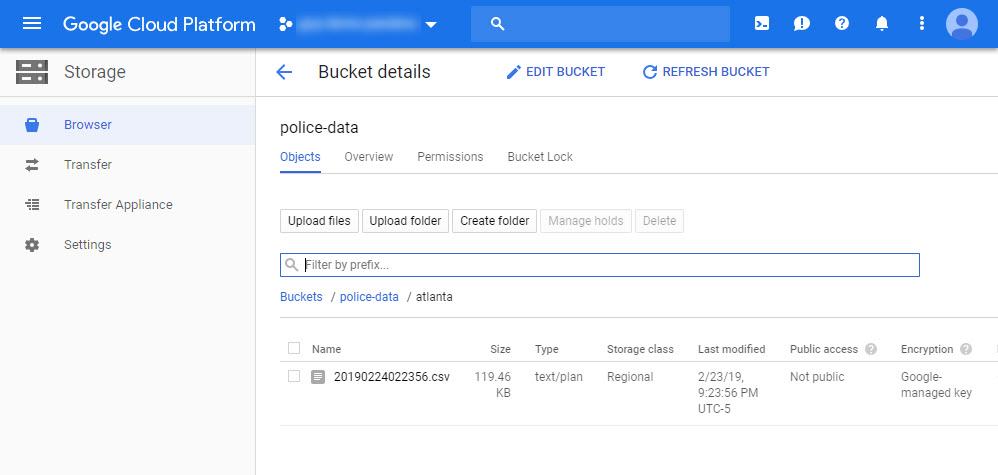
When I go check the storage bucket I do indeed see the file!
Data Studio
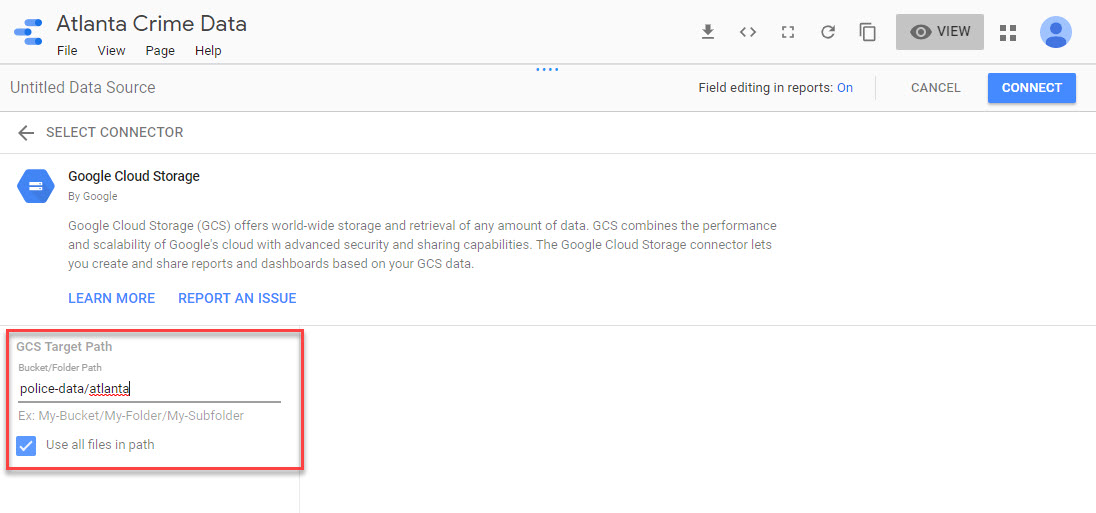
Before doing anything with Dataflow I can quickly mount this CSV into Data Studio to play with it. I’ll use the GCS connector and point to the bucket & sub-folder. Note the checkbox for using all of the files in the folder.
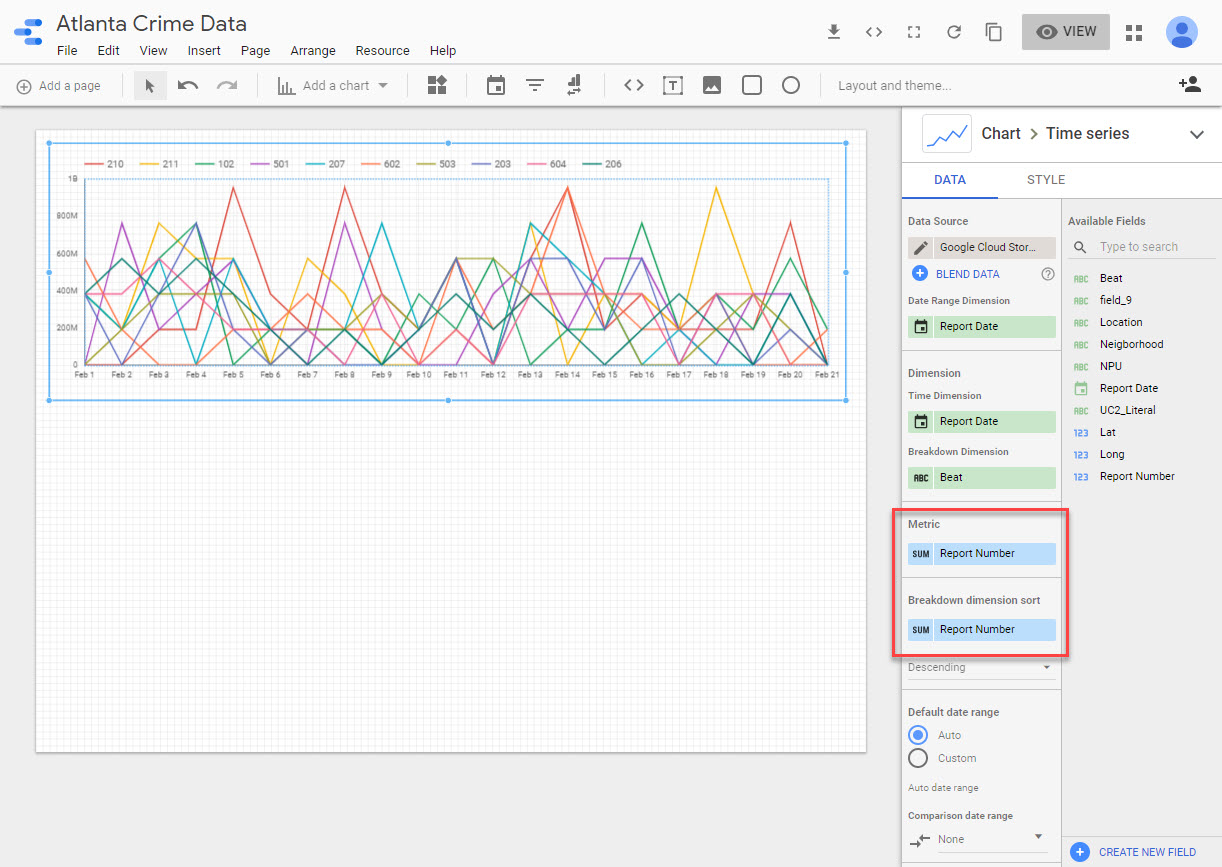
Once connected I can see that it’s messing up the schema for the beat…

I’ll have to fix that by converting it to a text field. Then I can save it and add a new Time Series chart. For some reason it tries to sum up the report number field, which yields counts in the millions.
I can fix this by modifying the schema and creating a new calculated field that performs a distinct count on the report number. Doing this will also ensure that any counts exclude duplicates (which will happen if I’m downloading every day). Ultimately this should be resolved in a Data Flow job.

