In this post I’ll show how to use MySQL Workbench to migrate data from an on-prem SQL Server Data Warehouse to a Cloud SQL Generation 2 MySQL instance. I’ll be using my home workstation to connect to the SQL Server and Cloud SQL proxy to connect to the MySQL instance hosted on Google Cloud Platform.
First I created a Cloud SQL instance via the GCP Cloud Console with these specs: generation 2 MySQL 5.7 auto-scaling instance with db-n1-standard-2 machine type.
Then I created a service account which has necessary roles (Client, Editor, Admin) for the Cloud SQL proxy account and downloaded the private key…

Open the Cloud SQL Instance and copy the connection name property to the clipboard…

Create a batch file that launches the a proxy for the Cloud SQL instance, using the downloaded private key and copied connection name…
“C:\Program Files (x86)\Google\cloud_sql_proxy_x64.exe” -instances=<connectionStringValue> -credential_file=”<pathToFile>” &
Launch the proxy by executing the batch file…

Now I can launch MySQL Workbench and create a new connection to the Cloud SQL instance via the proxy…

All I need to do is give my connection a name, server address of 127.0.0.1, and valid username/password combination (which is defined in the Cloud SQL instance via the cloud console)…

If I test the connection I’ll get an error…

To fix this I’ll need to white-list my IP address via the cloud console for the Cloud SQL instance…

With that fixed I can connect and run queries if I want to…

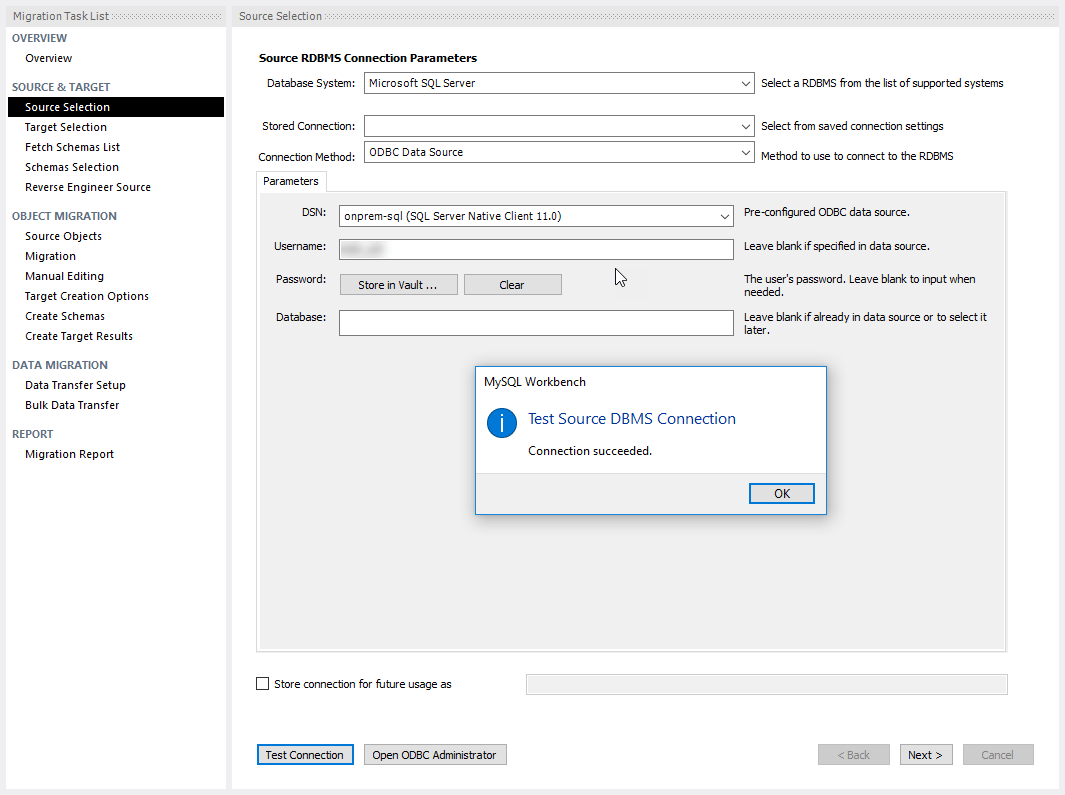
Now I need to establish an ODBC Data Source to the SQL Server that hosts my data…

Using the native drive is usually best, but you can pick whichever is appropriate for your source…

Have to give the DSN a name and then identify the server…

User name and password are next…

Everything is optional and really depends on your source….

With that saved I can flip back over to MySQL Workbench and launch the database migration wizard, selecting the SQL Server DSN I just created (note that the ODBC driver must be x64 if Workbench is x64)…
Next comes the Cloud SQL instance as the target…

After picking the source schema, object migration settings, and target rules, I started the copying process…

Pretty easy!
